
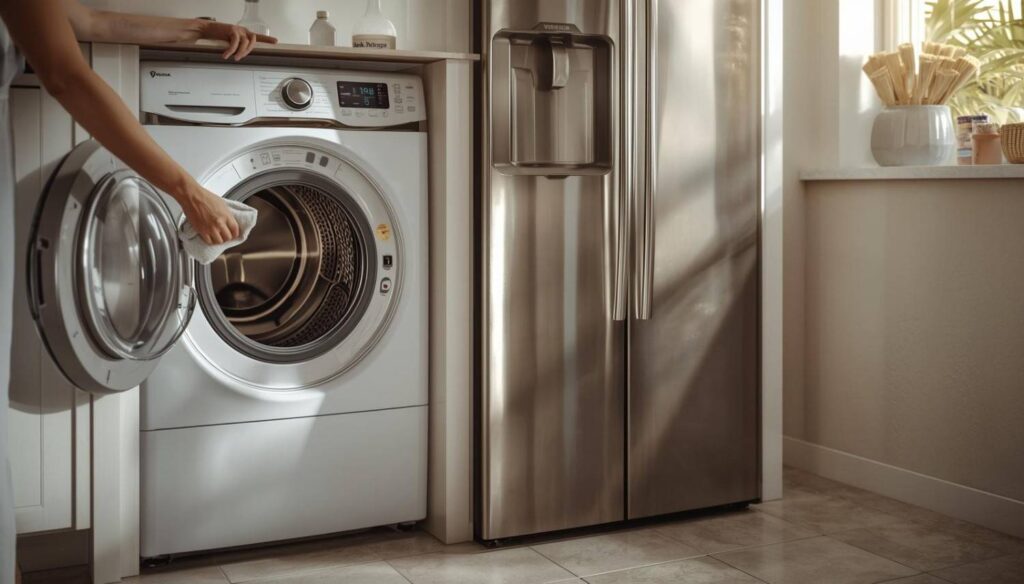
If you are like most Temecula homeowners, you probably wipe your washer drum and fridge shelves often, but you rarely think about the rubber door gaskets. Those soft seals around your washer and refrigerator doors hold back water and cold air, yet they quietly collect moisture, soap scum, and food residue. Over time, that mix turns into mold, mildew, and stubborn odors that can make laundry day or a quick snack run feel less fresh than it should.
In this guide from Temecula Appliance Repair, you will see the best way to clean rubber door gaskets on washers and fridges to prevent mold. You will also see simple habits that keep those seals cleaner for longer, and you will learn when it is time to call a local technician instead of fighting a worn‑out gasket. Along the way, you will find helpful internal resources that support a full appliance care routine in Southern California.
Why Washer And Fridge Door Gaskets Grow Mold
Rubber door gaskets are mold magnets because they combine moisture, warmth, and organic residue in tight, shaded spaces. On a front‑load washer, the gasket sits in direct contact with hot, soapy water during every cycle. Water and detergent splash into the folds and do not always drain away, especially if the washer does not get a chance to dry between loads. Soap residue and lint cling to the rubber and feed mold and bacteria.
Your refrigerator door gasket faces a different type of challenge. It sits in a cool environment, but it also catches drink spills, food splashes, crumbs, and sticky drips that get trapped in the grooves. Every time you open the fridge, warm kitchen air enters, then cools and condenses around the seal. That repeated condensation keeps the rubber slightly damp, which gives mold a place to grow if you do not clean it regularly.
If you ignore these small problems, you do not just get stains and odors. You can also end up with a poor door seal that affects temperature control and energy use. There is a helpful deep dive on how minor issues add up here.
Signs Your Washer Or Fridge Gasket Already Has Mold
You can usually spot gasket mold with your eyes and your nose. On a washer, you might see dark spots or streaks on the inner folds of the rubber. The material may look slimy, or you might notice pink or orange film around the bottom where water settles. When you open the door, a musty or sour odor may hit you before you even look inside. If that smell remains after a cycle, the gasket is a likely culprit.
On a refrigerator, gasket mold often shows up as black or gray lines in the grooves, or as dark patches along corners and the bottom edge. You may see stubborn stains that do not wipe away with a quick swipe. You might also notice that the fridge smells slightly stale when you open the door, even if the interior looks clean. In some cases, food near the door spoils sooner because warm air slips in around a weakened seal.
Performance changes can also point to gasket trouble. If your washer door leaks during a cycle, or if your fridge seems to run longer than usual, the seal may not sit tight anymore. This guide on refrigerator door not sealing properly, causes and easy fixes covers that in more detail.
Safety And Prep Before You Clean Any Rubber Gasket
Before you start scrubbing, you should set up a safe, simple cleaning plan. First, unplug the washer or fridge, or switch off the breaker, so you do not work around live electrical parts while using liquid cleaners. This is a small step, but it reduces the risk of shocks and eliminates the chance of the appliance starting mid‑clean.
Next, gather your supplies so you do not interrupt the job halfway through:
- Soft microfiber cloths or old towels.
- An old toothbrush or soft‑bristle brush.
- Cotton swabs for tight folds and corners.
- A spray bottle.
- White vinegar and warm water.
- Mild dish soap.
- Baking soda for extra scrubbing power.
- Optional hydrogen peroxide for stubborn mold on washer gaskets.
You should also use gloves, especially if you are sensitive to mold or cleaners. If the mold growth is heavy, a simple mask can help reduce irritation from spores. For a wider look at safe cleaning habits around appliances, you can review this home appliance safety checklist every homeowner should follow.
Step‑By‑Step: How To Clean A Front‑Load Washer Door Gasket
1. Wipe Loose Debris And Standing Water
Start by opening your front‑load washer door as wide as it will go. Gently pull back the inner rubber ring so you can see into each fold. You will likely find lint, hair, and a bit of standing water along the bottom. Use a damp cloth or paper towel to scoop out this debris. This simple prep step allows your cleaning solution to reach the mold instead of soaking into gunk.
If the water you find looks dirty or smells strong, keep wiping until the area is as dry and clean as you can manage with plain water. The less buildup you leave behind, the better your cleaner will work.
2. Apply A Washer‑Safe Cleaning Solution
For most washers, a mix of equal parts white vinegar and warm water is a safe and effective gasket cleaner. You can pour it into a spray bottle and spray it directly into the folds, or you can soak a cloth and press it into the rubber. Vinegar helps break down soap scum and fights mold growth without harsh fumes.
If the mold is heavy, you can use hydrogen peroxide on the worst spots. Some manufacturers also allow a diluted bleach solution, such as about 3/4 cup bleach in 1 gallon of warm water. Always check your user manual before you use bleach. Once you apply your chosen cleaner, let it sit for a few minutes so it can loosen stains and kill surface mold.
3. Scrub Gently Inside Every Fold
Use an old toothbrush or a soft scrub brush to work the cleaner into every fold. Move slowly around the entire gasket and pay extra attention to the bottom, where moisture pools. Short, firm strokes help lift stains, but you should avoid aggressive scrubbing that could tear the rubber. Do not use metal tools or abrasive pads because they can cut the gasket and lead to leaks later.
If you see mold hiding deep in a crease, use a cotton swab dipped in your cleaner to reach it. This is the part that takes the most time, but it has the biggest payoff in terms of odor control and mold prevention.
4. Rinse, Wipe, And Dry Completely
Once the stains look lighter and the surface feels cleaner, use a new cloth dampened with plain water to wipe away leftover cleaner. Move around the entire gasket several times until the cloth comes away fairly clean. You do not want cleaning solution to sit on the rubber indefinitely.
Then, use a dry towel to remove as much moisture as possible from the gasket and glass. This step matters more than people think. Mold needs moisture to grow. If you leave the gasket wet, it will return. After you dry the seal, you can run an empty hot cycle with a washer cleaner or a cup of vinegar in the drum to rinse the interior. This helps tackle odors inside the tub as well.
For a deeper cleaning routine that protects the gasket and the drum, check out how to deep clean a front load washing machine without damaging seals.
You may also find this guide useful if mold has already started inside the tub.
Step‑By‑Step: How To Clean A Refrigerator Door Gasket
1. Power Down And Clear The Area
Unplug your refrigerator or turn off the appropriate breaker. This prevents fans and lights from cycling while you work and keeps things safer. Then remove items from the door shelves. This gives you full access to the gasket and keeps containers from spilling while you clean.
You do not have to empty the entire fridge for a quick gasket clean, but clearing the door area makes the job easier and less messy.
2. Wipe Away Crumbs And Surface Residue
Use a damp cloth to wipe along the gasket and remove crumbs, dried spills, and any loose residue. Work your fingers under each flap of rubber and pull it gently away from the door to reach deeper grooves. This pre‑clean step prevents grit from scratching the gasket when you scrub later.
If you see sticky areas from juice or sauce, spend a little extra time here until the surface feels smoother.
3. Use Food‑Safe Cleaners For Mold And Mildew
For refrigerator seals, stick with food‑safe cleaners. A simple mix of equal parts white vinegar and warm water in a spray bottle works very well. Spray the solution along the gasket and into each fold. Vinegar helps break up grime and discourages mold without leaving harmful residue near your food.
For more stubborn stains, you can sprinkle a bit of baking soda onto the damp gasket. The combination of vinegar and baking soda gently lifts deposits without scratching the rubber. Avoid strong undiluted bleach on fridge gaskets. It can weaken rubber over time and might not be safe so close to food storage.
4. Scrub Creases And Corners Carefully
Use your toothbrush or small brush to scrub the gasket. Focus on corners, hinge areas, and the bottom edge, since spills and condensation often collect there. Move your hand slowly and work the bristles into each groove. If your brush cannot reach a tight spot, switch to cotton swabs dipped in vinegar.
The goal is to remove visible mold and film, not to grind away the surface. If an area does not come clean after several passes, you may be dealing with a stain inside damaged rubber, which cleaning cannot fully fix.
5. Rinse, Dry, And Check The Seal
Wipe the gasket with a clean cloth dampened with plain water to remove leftovers from the cleaner. Then dry it thoroughly with a microfiber towel. Feel along the entire length to make sure there is no standing moisture in the folds.
Once it is dry, plug the fridge back in and close the door. Check that the seal sits flat against the frame with no obvious gaps. If the gasket still looks warped or cracked, or if the door seems loose, it might be time for a new seal. For more on how a good seal affects performance, see why your refrigerator keeps running non‑stop and how to troubleshoot it here.
And for a complete look at gasket cleaning from Temecula Appliance Repair, you can read here.
How Often You Should Clean Washer And Fridge Gaskets
You get the best results when you treat gasket care as a regular habit instead of a one‑time project. For your front‑load washer, you should:
- Wipe the gasket and glass dry after heavy or hot loads.
- Leave the door open between cycles so air can move through the drum.
- Do a deeper gasket clean about once a month or every 30 cycles, and more often if you see or smell mold.
For your refrigerator, you should:
- Wipe the gasket quickly every week with a bit of vinegar or mild dish soap.
- Do a more thorough gasket cleaning every two to three months, or sooner if you spot grime or stains.
Households in Temecula with big families, frequent cooking, or lots of laundry may need to clean seals more often than smaller households. To place gasket care in a bigger context, it helps to follow a simple schedule like the daily, weekly, and yearly appliance maintenance checklist for busy families.
You can also see how often each major appliance needs service here.
Daily And Weekly Habits That Prevent Gasket Mold
Once your gaskets are clean, a few small habits will keep them that way. For washers, try to:
- Leave the washer door slightly open after every cycle so the drum and gasket dry out.
- Remove wet clothes right away instead of letting them sit for hours.
- Use the right amount of HE detergent so you do not leave excess soap on the seal.
- Wipe the gasket with a dry cloth after very hot or bulky loads.
For refrigerators, you can:
- Wipe spills as soon as they happen instead of waiting for a deep clean.
- Keep door shelves organized and avoid overstuffing them, which reduces stress on the seal and limits leaks onto the gasket.
- Do a quick gasket wipe every week when you check expiration dates or trash old food.
If you want to pair gasket care with better overall fridge performance, this guide on how to clean refrigerator condenser coils safely and why it matters is a good companion.
You can also keep your focus on gaskets with this dedicated article from Temecula Appliance Repair.
When DIY Cleaning Is Not Enough And You Need A New Gasket
There comes a point where cleaning no longer gives you a good seal. If your washer or fridge gasket is cracked, torn, or permanently warped, no amount of scrubbing will restore the shape. You might notice that the door will not stay closed, that water leaks from the washer door, or that your fridge has warm spots and excessive frost.
A worn gasket can waste energy, strain the compressor, and shorten the life of the appliance. For example, a fridge that runs constantly because cold air escapes can lead to higher bills and more wear on key parts. There is a detailed look at these issues in refrigerator repair in Southern California here.
When you reach this stage, a replacement seal is usually the smart move. A professional from Temecula Appliance Repair can confirm the problem, source the correct gasket for your brand, and install it so the door closes properly again. Some gasket jobs involve door alignment and hinge checks, which are better handled by a trained technician. For tasks that carry shock or fire risk, it is also wise to use this guide as a reference.
How Temecula Appliance Repair Helps With Moldy Gaskets
Temecula Appliance Repair supports you through the full life of your washer and refrigerator door gaskets. If you are in Temecula, Murrieta, Wildomar, Menifee, Lake Elsinore, Canyon Lake, Winchester, or Fallbrook, you can call on the team for both cleaning advice and professional gasket replacement. Technicians work with major brands you see every day in Southern California homes, such as Whirlpool, LG, Samsung, GE, and Bosch.
During a service visit, your technician can:
- Inspect the gasket for damage, stiffness, and gaps.
- Check door hinges, latches, and alignment to make sure the door closes evenly.
- Clean salvageable gaskets safely with professional products.
- Replace worn gaskets and test for a tight seal.
- Suggest a simple routine to keep the new seal clean and mold free.
If you already see heavy mold or suspect the gasket is leaking or failing, you can schedule help quickly through book an appliance repair technician in Southern California here.
You can also frame this as part of a wider care plan through appliance maintenance tips to avoid costly repairs.
FAQs
How often should I clean the rubber gasket on my front‑load washer?
You should wipe the gasket and glass dry after each wash and perform a deeper clean about once a month. If you live in a humid part of Southern California or run several loads a day, you may need to clean it more often.
What cleaner is safest for washer and fridge gaskets?
White vinegar mixed with warm water is safe and effective for both washer and fridge gaskets. You can also use a small amount of mild dish soap. For heavy mold on washer seals, hydrogen peroxide or diluted bleach can work if your washer manual allows it, but you should avoid strong bleach on fridge gaskets.
How do I keep mold from coming back on my washer gasket?
Leave the door cracked open between cycles, remove wet clothes right away, and wipe the gasket dry after big loads. Use the correct amount of HE detergent to avoid residue and clean the gasket monthly. This guide from Temecula Appliance Repair explains more methods:
https://appliancerepairsoutherncalifornia.com/how-to-prevent-mold-in-your-washing-machine/
Can I use bleach on refrigerator door gaskets?
You should avoid undiluted bleach on fridge gaskets because it can weaken the rubber and is not ideal near food. Vinegar, mild soap, and baking soda provide safer long‑term options for mold and stains on refrigerator seals.
When should I call Temecula Appliance Repair about my gaskets?
You should call Temecula Appliance Repair if the gasket is cracked, torn, or warped, if the door will not seal even after cleaning, or if your fridge or washer leaks or runs constantly. At that point, a technician can inspect, repair, or replace the gasket so your appliance works safely and efficiently.

Eric Adams
Eric is the lead repair expert at Appliance Repair Southern California. With 17+ years of experience, he has built a reputation for providing fast, reliable, and high-quality repair services across Southern California. His expertise covers a wide range of appliances, including refrigerators, ovens, dishwashers, and washing machines. Eric is committed to exceptional customer service and ensuring every repair is done right the first time. Under his leadership, Appliance Repair Southern California continues to be a trusted name in the industry.