At Appliance Repair Southern California, we understand the inconvenience and frustration of dealing with a freezer that isn’t defrosting. This issue can lead to spoiled food, higher energy bills, and unnecessary stress. Our team of experts has compiled a detailed guide to help you troubleshoot and resolve this problem efficiently.
Common Causes of a Freezer Not Defrosting
1. Faulty Defrost Timer
The defrost timer controls the defrost cycle of the freezer. If the timer malfunctions, the defrost heater won’t turn on, causing frost buildup.
2. Defective Defrost Heater
The defrost heater melts the frost accumulated on the evaporator coils. A defective heater will result in excessive frost buildup, hindering the freezer’s performance.
3. Malfunctioning Defrost Thermostat
The defrost thermostat monitors the temperature of the evaporator coils. If it fails, the defrost heater won’t activate, leading to frost accumulation.
4. Clogged Defrost Drain
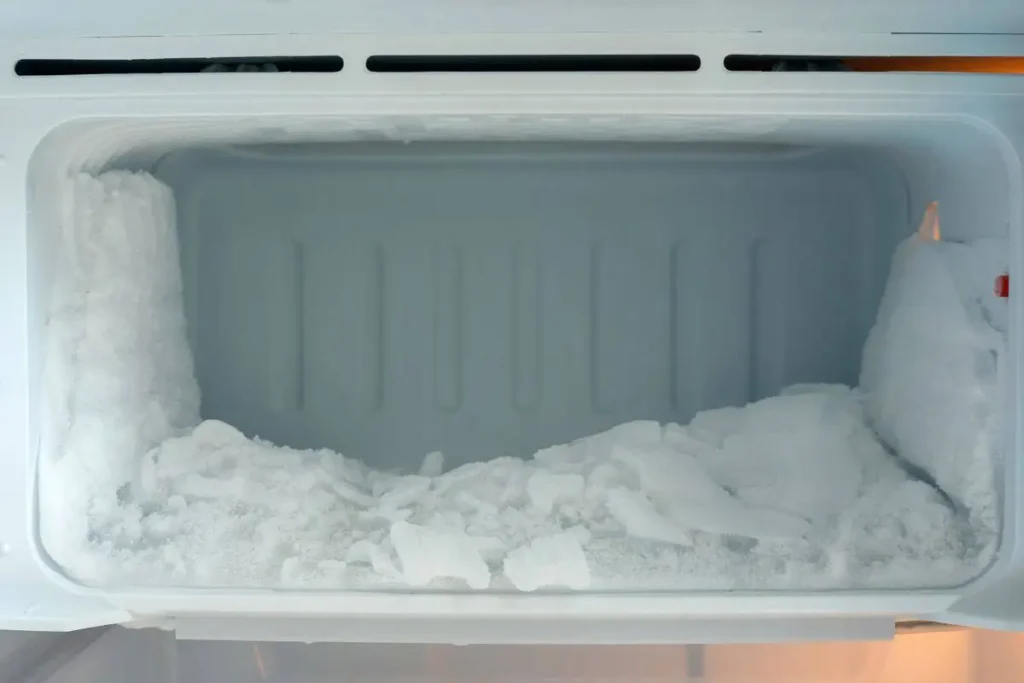
A clogged defrost drain prevents melted water from draining, causing it to freeze again and block airflow.
5. Faulty Door Gaskets
Damaged or worn door gaskets allow warm air to enter the freezer, causing frost buildup and affecting the defrost cycle.
Step-by-Step Troubleshooting Guide
1. Check the Defrost Timer
- Locate the Defrost Timer: Refer to your freezer’s manual to find the defrost timer.
- Manually Advance the Timer: Use a screwdriver to turn the timer dial slowly until it clicks.
- Wait for the Defrost Cycle: If the heater turns on, the timer is faulty and needs replacement.
2. Test the Defrost Heater
- Unplug the Freezer: Safety first, always disconnect the power.
- Locate the Heater: The defrost heater is usually behind the back panel inside the freezer.
- Use a Multimeter: Set the multimeter to the ohms setting and place the probes on the heater terminals.
- Check the Reading: A reading of 0 ohms indicates a good heater, while infinity or no reading means it’s defective.
3. Inspect the Defrost Thermostat
- Access the Thermostat: It’s typically clipped to the evaporator coils.
- Check Continuity: Use a multimeter to test for continuity. If there’s no continuity at a low temperature, the thermostat is faulty.
4. Clear the Defrost Drain
- Locate the Drain Hole: It’s usually at the bottom of the freezer.
- Flush with Hot Water: Use a turkey baster to flush the drain with hot water and dissolve any clogs.
- Use a Pipe Cleaner: If water doesn’t clear the clog, use a pipe cleaner to remove the debris.
5. Examine the Door Gaskets
- Inspect for Damage: Look for cracks, tears, or deformities in the gaskets.
- Perform the Dollar Bill Test: Close the door on a dollar bill. If you can pull it out easily, the gasket isn’t sealing properly.
- Replace the Gasket: Purchase a new gasket and follow the manufacturer’s instructions for installation.
Preventive Maintenance Tips
Regular Defrosting
Manually defrost your freezer every six months to prevent excessive frost buildup.
Keep the Freezer Full
A well-stocked freezer maintains its temperature better, reducing the strain on the defrost system.
Clean the Coils
Vacuum the condenser coils every six months to ensure efficient operation.
Monitor Door Seals
Regularly check and clean door gaskets to ensure a proper seal.
Temperature Settings
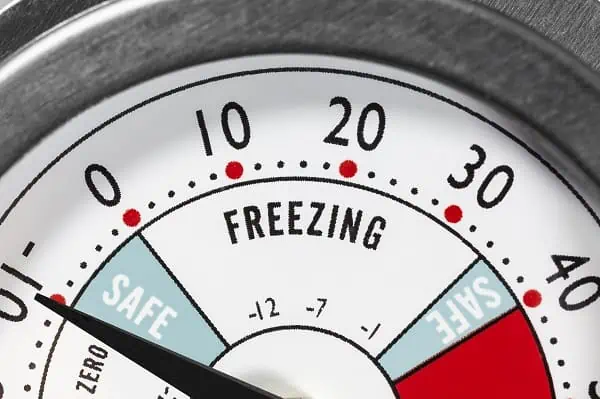
Keep the freezer temperature between 0°F and 5°F (-18°C to -15°C) for optimal performance.
Conclusion
At Appliance Repair Southern California, our mission is to provide top-notch repair services and ensure your appliances function optimally. If your freezer is not defrosting, follow this comprehensive guide to diagnose and fix the issue. For professional assistance, contact us, and we’ll be happy to help you restore your freezer’s performance.

Eric
Eric is the founder and lead repair expert at Appliance Repair Southern California. With 17+ years of experience, he has built a reputation for providing fast, reliable, and high-quality repair services across Southern California. His expertise covers a wide range of appliances, including refrigerators, ovens, dishwashers, and washing machines. Eric is committed to exceptional customer service and ensuring every repair is done right the first time. Under his leadership, Appliance Repair Southern California continues to be a trusted name in the industry.